KURZANLEITUNGEN
Alle öffnen
Alle schließen
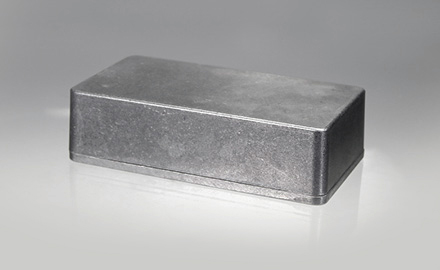
MATERIALBEISTELLUNG (KUNDENMATERIAL)
Wir bearbeiten auch Ihr eigenes Material, Halbzeuge oder Fertigteile. Auch für diese Aufträge können Sie wie gewohnt mit dem Frontplatten Designer arbeiten. Erfahren Sie hier, was Sie im Programm und bei der Materialbeistellung beachten müssen.
Vorgehen
Ausgangsmaterialien
- Wir können grundsätzlich alle Materialien bearbeiten, die unter Material aufgeführt sind.
- Die Bearbeitung von Stahl und Elastomeren ist nicht möglich.
- Bitte setzen Sie sich mit uns in Verbindung, wenn Sie Ihr Beistellungsmaterial nicht genau klassifizieren können. Wir erproben die Bearbeitung gerne für Sie.
Einspann- und Bearbeitbarkeit
- PlattenFür beigestellte Platten gelten grundsätzlich dieselben geometrischen Einschränkungen wie für unser eigenes Platten-Material (siehe die entsprechenden Tabellen in der Online-Hilfe, z.B. für Aluminium und Messing).
- Halbzeuge und FertigteileWir können unterschiedlich geformte Werkstücke bearbeiten, sofern deren Geometrie die Bearbeitung in unseren CNC-Fräsmaschinen erlaubt. Die Einspann- und Bearbeitbarkeit lässt sich anhand einer technischen Zeichnung oder eines Musters klären. Senden Sie ggf. Ihre Anfrage einschließlich technischer Zeichnungen an service@schaeffer-ag.de.
Vorgehen im Frontplatten Designer
- Setzen Sie im Dialog "Eigenschaften der Frontplatte" das Häkchen bei "Kundenmaterial verwenden".Hinweis: Wenn das Häkchen gesetzt ist, warten wir auf Ihre Beistellung. Andernfalls würden wir Ihren Auftrag automatisch mit dem ausgewählten Plattenmaterial ausführen.
- Bitte beschreiben Sie das Ausgangsmaterial im Dialog "Eigenschaften der Frontplatte" im Feld "Anmerkung für die Fertigung", unabhängig davon, ob es in der Dropdown-Liste für das Material aufgeführt ist oder nicht.
- Falls in Ihrem Material Bereiche mit unterschiedlichen Dicken durchbrochen bzw. durchbohrt werden sollen, so verwenden Sie bitte die größte vorkommende Dicke für die Grundplatte.
- Fügen Sie in die FPD-Datei nur diejenigen Elemente ein, die noch gefertigt werden sollen. Sind auf einer Platte z.B. bereits Systembohrungen vorhanden, dürfen diese nicht in der .fpd-Datei eingezeichnet sein (oder allenfalls als nicht zu fertigende "Hilfselemente").
- Die Außenmaße der FPD-Datei und des beigestellten Materials müssen identisch sein. (Bei nicht rechteckigen Platten gilt dies für das umhüllende Rechteck.)
Der Beistellprozess:
- Damit wir genau wissen, wie die Platte auf der Maschine eingespannt werden soll, markieren Sie bitte die linke untere Ecke Ihres beigestellten Materials (z.B. mittels eines Aufklebers). Sollten einzelne Maße oder der Nullpunkt von der FPD-Datei abweichen, kennzeichnen Sie dies bitte auf dem beigestellten Material oder beschreiben es anderweitig.
- Das Material können Sie uns per Post (auch UPS, FedEx, etc.) zuschicken. Bitte vermerken Sie unsere Referenznummer auf Ihrem Lieferschein. Diese erhalten Sie, sobald Ihr Auftrag an uns übermittelt wurde.
- Sobald Ihr Material bei uns eingetroffen ist, erhalten Sie die Auftragsbestätigung und wir beginnen mit der Fertigung.
Beistellen von Material, das von uns noch zugeschnitten werden muss ("Kundenzuschnitt"):
Wenn Sie Material beistellen, dessen Maße/Form nicht mit denen des Endprodukts übereinstimmen, gehen Sie folgendermaßen vor:
- In diesem Fall setzen Sie NICHT das Häkchen bei "Kundenmaterial verwenden".
- Je nachdem, ob das Plattenmaterial in der Materialauswahl des Frontplatten Designers enthalten ist oder nicht, wählen Sie das passende Material oder belassen die Auswahl auf dem Standardwert.
- Vermerken Sie im Feld "Anmerkungen für die Fertigung", dass das Material von Ihnen beigestellt wird und um welches Material es sich handelt. In der Preisberechnung des Frontplatten Designers werden Ihnen Materialkosten angezeigt, werden aber im Angebot selbstverständlich nicht aufgeführt.
- Wichtig: Die Platte muss aus Gründen der Einspannbarkeit in x- und y-Richtung mindestens 30 mm größer sein als der letztendliche Zuschnitt.
Hinweise für die Bereitstellung von Material für Kunden aus Ländern außerhalb der EU:
- Grundsätzlich werden auf die Einfuhr von Waren aus Ländern außerhalb der EU Einfuhrabgaben erhoben. Bei der Bereitstellung von Material zur Weiterverarbeitung handelt es sich nach dem Gesetzgeber jedoch um eine "aktive Veredlung", die von Einfuhrabgaben befreit ist. Den Antrag für die Bewilligung der aktiven Veredlung stellen Sie mit der elektronischen Zollanmeldung oder schriftlich unter der Verwendung folgender Formulare:
- 033025/1 Einheitspapier Ausfuhr/Sicherheit
- 0254-E- /2 Ergänzungsblatt zum Antrag auf Bewilligung einer aktiven Veredelung nach Artikel 163 UZK - DA (8/2016)
- Weitere Informationen:https://www.zoll.de/DE/Fachthemen/Zoelle/Zollverfahren/Aktive-Veredelung/Bewilligung/Antrag-Bewilligung/antrag-bewilligung_node.html
- Die Verantwortung für die Einfuhr Ihres Produkts liegt bei Ihnen. Die Schaeffer AG wirkt bei der Einfuhrabwicklung weder aktiv mit noch beteiligt sich an möglichen Einfuhrabgaben. Eventuell entstehende Kosten gehen zulasten des Auftraggebers und werden weiterberechnet.
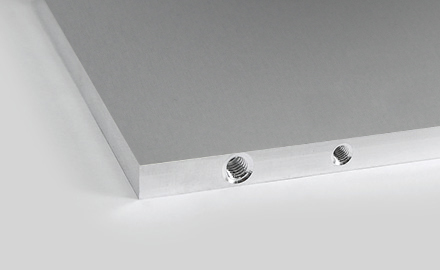
STIRNSEITENBEARBEITUNG
Wir können auch die Stirnseiten Ihrer Frontplatte bearbeiten. Nutzen Sie diese Möglichkeit, um Gewindesacklöcher und andere Fräselemente auf den Frontplatten-Stirnseiten zu platzieren.
Vorgehen
Stirnseiten-Dateien
- Erstellen Sie für jede zu bearbeitende Stirnseite eine zusätzliche Datei, die die Draufsicht auf die betreffende Stirnseite abbildet. Für die Breite und Höhe geben Sie die tatsächlichen Maße der Stirnseite ein. Lassen Sie das Material auf dem Standardwert stehen. Als Dicke wählen Sie einfach die größtmögliche Materialdicke (10 mm).Wichtig: Setzen Sie ein Häkchen bei der Option "Kundenmaterial", damit in der Preisberechnung der Stirnseitendatei nicht erneut Materialkosten berechnet werden. Bitte notieren Sie im Fenster "Anmerkung für die Fertigung", um welche Stirnseite es sich handelt. Zum Beispiel: "Rechte Stirnseite der Datei XXX".
- Platzieren Sie die gewünschten Elemente auf der Frontplatte.Hinweis zur Orientierung der Stirnseitendatei: Zeichnen Sie die Draufsicht auf die Stirnseite. Das heißt zum Beispiel: Wenn die untere Stirnseite der Frontplatte bearbeitet werden soll, entspricht die Oberkante der Stirnseitendatei der Unterkante der Frontplattendatei usw. Um Missverständnisse zu vermeiden, können Sie zusätzlich ggf. eine Skizze an Ihre Bestellung anhängen.
Geometrische Randbedingungen
Es sollten umlaufend zum Sackloch mindestens 1 mm Material stehen bleiben. Um beispielsweise Sacklöcher mit M2 Gewinde zu erhalten, sollte die Grundplatte also mindestens 4 mm dick sein.
Bedenken Sie bitte, dass im Bereich der Eckenradien keine Bohrungen angesetzt werden können.
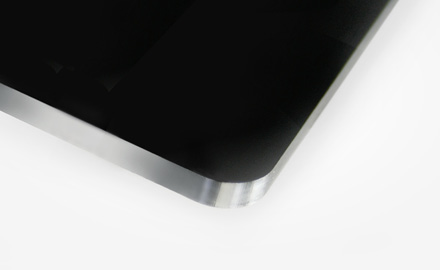
KANTEN SCHLEIFEN
Nach der Fertigung können die Außenkanten (Stirnseiten) der Frontplatte Bearbeitungsspuren wie z.B. Fräsmarken aufweisen. Wir bieten Ihnen als Service, die Außenkante Ihrer Frontplatte zu schleifen. Dadurch werden sämtliche Bearbeitungsspuren getilgt und die Kante erscheint optisch matter (ähnlich dem Natur-Eloxal).
Vorgehen
- Rechteckige PlattenSetzen Sie im Fenster "Eigenschaften der Frontplatte" (Strg + F) das Häkchen bei "Außenkanten schleifen". Der Preis wird Ihnen in der Preisberechnung im Frontplatten Designer angezeigt.
- Elliptische Platten oder Platten mit DXF-AußenkonturGeben Sie im Fenster "Eigenschaften der Frontplatte" (Strg + F) in das Feld "Anmerkungen für die Fertigung" den Text "Außenkanten schleifen" ein. Da in diesen Fällen die Kosten aufwandsabhängig sind und von uns gesondert ermittelt werden, bleibt die Preisberechnung im Frontplatten Designer unvollständig. Die Kosten teilen wir Ihnen auf Anfrage oder im Angebot / in der Auftragsbestätigung mit.
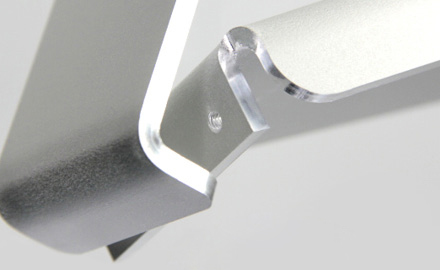
BIEGEN
Wir können Ihre Frontplatte auch biegen. Die zusätzlichen Kosten für diesen Service teilen wir Ihnen auf Anfrage und im Angebot mit.
Vorgehen
- Erstellen Sie die Frontplattendatei als Abwicklung der zu biegenden Platte. Die Biegeverkürzung brauchen Sie nicht mit einzuberechnen; das erledigen wir für Sie.
- Wichtig: In das Feld "Anmerkungen für die Fertigung" schreiben Sie: "Biegen laut Zeichnung".
- Übermitteln Sie uns eine Biegeskizze, aus der Folgendes hervorgeht:
- Biegeradius (mögliche Radien: 0,5 mm, 3 mm, 5 mm)
- Biegewinkel
- Schenkellängen
Bitte beachten Sie folgende Vorgaben:
- Der Biegeradius darf nicht kleiner als die Materialdicke sein
- Schenkel müssen mindestens 10 mm lang sein
- Gefräste Elemente sollten mind. 10 mm von der Biegekante entfernt platziert werden.
Sollten Sie diese Parameter nicht einhalten können, können Sie uns gerne kontaktieren und wir prüfen die Machbarkeit Ihrer Wünsche. Beachten Sie bitte außerdem: Die Eloxalschicht wird an der Außenseite der Biegung ggf. rissig.
NACHTRÄGLICHES ELOXIEREN
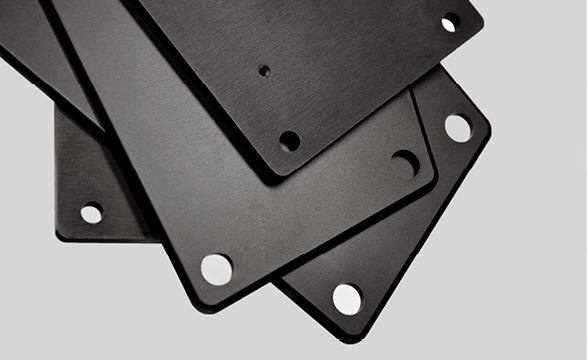
Da wir die Platten in bereits eloxiertem Zustand verarbeiten, sind die Außenkanten und sämtliche weiteren Fräskanten Ihrer Frontplatte blank, also unbehandelt. Wenn Sie eloxierte Kanten wünschen, können wir Ihre Frontplatte nachträglich eloxieren. Dieser Service ist für eloxiertes sowie für gegossenes Aluminium möglich.
Vorgehen
Der Aufpreis für das nachträgliche Eloxieren ist in der Preisberechnung des Programms nicht enthalten. Bitte kontaktieren Sie uns unter service@schaeffer-ag.de, um die anfallenden Kosten, abgeänderte Lieferzeiten sowie mögliche Grenzen für die Ausführungsqualität zu erfragen.
Vorgehen im Frontplatten Designer
- Stellen Sie als Material "Aluminium eloxiert" ein und als Farbe die gewünschte Farbe.
- Schreiben Sie das nachträgliche Eloxieren sowie nochmals die gewünschte Farbe in das Feld "Anmerkung für die Fertigung" (z.B. "Nachträglich eloxieren, schwarz").
BESCHAFFUNG
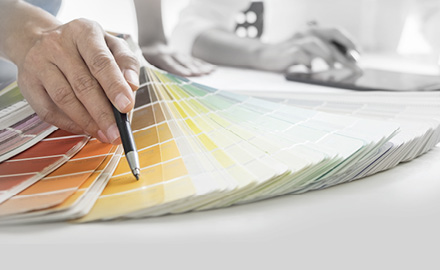
Wenn Sie ein Material, einen Pulverlack oder eine Gravurfarbe verwenden möchten, die nicht im Frontplatten Designer aufgeführt sind, teilen Sie uns dies einfach in Ihrer Frontplattendatei mit.
Vorgehen
- Material: Belassen Sie in der FPD-Datei das Material auf den Standard-Einstellungen (Aluminium eloxiert, Farbe Natur). Schreiben Sie das gewünschte Material in das Feld "Anmerkung für die Fertigung"
- Pulverlack: Stellen Sie als Material "Aluminium pulverbeschichtet" ein. Als Farbe wählen Sie eine beliebige Farbe. Schreiben Sie dann die gewünschte Farbe sowie ggf. Glanzgrad und Struktur in das Feld "Anmerkung für die Fertigung".
- Auslegefarbe: Stellen Sie eine beliebige Farbe als Gravurfarbe ein (im Eigenschaftenfenster des jeweiligen Gravurelements). Im Feld "Anmerkungen für die Fertigung" (im Eigenschaftenfenster der Frontplatte) erläutern Sie bitte, für welche Gravur welche Farbe bestellt und verwendet werden soll.
Die Preisberechnung im Frontplatten Designer bleibt in diesen Fällen unvollständig. Die Kosten für das Material und dessen Beschaffung teilen wir Ihnen auf Nachfrage oder im Angebot / in der Auftragsbestätigung mit. Ebenso finden Sie die Beschaffungskosten unter Preise & Service.
SERIENNUMMERN
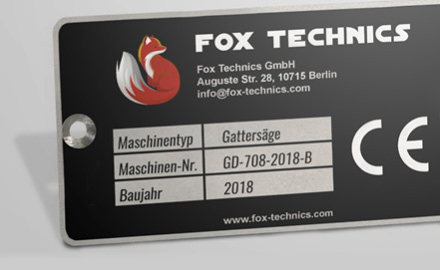
Mit der Textgravur-Funktion im Frontplatten Designer können Sie auch eine Frontplatten-Serie mit fortlaufenden Seriennummern beschriften.
Vorgehen
- Fügen Sie die erste Seriennummer als Textgravur an der entsprechenden Stelle in die Frontplatte ein.Hinweis: Soll die Seriennummer nicht graviert, sondern gedruckt werden, wählen Sie im Textgravur-Dialog unter "Drucken/Auslegen" die Option "Dieses Element immer drucken".
- Schreiben Sie im Dialog "Eigenschaften der Frontplatte" (Strg + F) in das Feld "Anmerkungen für die Fertigung" den Text "Bitte mit Seriennummer fertigen von ... bis ..."
Hilfselemente & Objekt-IDs
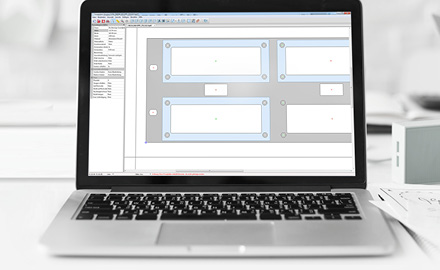
Im Frontplatten Designer können Sie Hilfselemente platzieren und Objekt‑IDs vergeben. Nutzen Sie diese Funktionen z.B., um Kommentare, Markierungen oder Informationen zu Einbauelementen einzufügen; um die Umrisse von angrenzenden Teilen darzustellen; um Hilfslinien zu platzieren; zu Dokumentationszwecken oder um den Überblick über eine Vielzahl von Fräselementen zu gewährleisten.
Vorgehen
Um ein Element als Hilfselement zu deklarieren, verwenden Sie einfach die bekannten Elemente (Fräsobjekte, Gravurelemente, Grafikdateien) und setzen im jeweiligen Eigenschaftsdialog das Häkchen bei "Element nicht fertigen". Die betreffenden Elemente werden in der Zeichnung blau dargestellt und werden weder in der Fertigung noch in der Preisberechnung berücksichtigt.
Um einem Element eine Objekt-ID zuzuweisen, markieren Sie das Element auf der Frontplatte und schreiben Sie den entsprechenden Text in das Feld "Objekt-ID" im Bereich "Elementeigenschaften" (falls dieses nicht angezeigt wird: Ansicht > Elementeigenschaften). Die Objekt-ID wird insbesondere im Skripting genutzt für die eindeutige Identifizierung von Elementen.
Bitte nutzen Sie diese Möglichkeiten in erster Linie für Hinweise, die Sie selbst benötigen. Hinweise, die sich an unsere Fertigung richten, schreiben Sie bitte in das Feld "Anmerkung für die Fertigung".
ACRYL-DISPLAYS
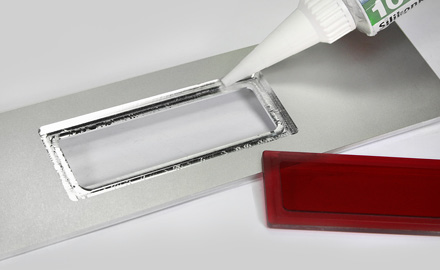
Mit dem Frontplatten Designer können Sie Ausschnitte für Displays inklusive der passenden Acrylscheibe erzeugen. Einen geeigneten Klebstoff bekommen Sie ebenfalls bei uns.
Vorgehen
Wir empfehlen, die Acrylscheibe bündig in die Frontplatte einzulassen und ringsum eine Klebefläche von 2 mm vorzusehen. Zwischen Acrylscheibe und Fensteröffnung sollte ein Spiel von 0,2 mm gelassen werden.
Im Folgenden ein Beispiel für ein Displayfenster mit eingelassener Acrylscheibe in der Größe 60 mm x 25 mm:
- Erzeugen Sie eine Frontplatte mit der Materialstärke 2 mm.
- Fügen Sie einen rechteckigen Durchbruch in die Frontplatte ein:Breite: 60 mmHöhe: 25 mmEckenradius: 1 mm
- Fügen Sie eine Planfläche ein:Einfügepunkt: Zentrum des eben erstellten DurchbruchsFlächenform: Rechteck in RechteckAuf der Rückseite platzieren: JaBreite: 64 mmHöhe: 29 mmTiefe: 1 mmEckenradius: 1,5 mmBreite der Innenfläche: 56 mmHöhe der Innenfläche: 21 mm
- Erstellen Sie nun eine zusätzliche Frontplattendatei:Breite: 63,6 mmHöhe: 28,6 mmMaterialstärke: 2 mmMaterial: Acryl (je nach Anwendungsfall klar oder rot)Eckenradius: 1,3 mm
- Fügen Sie eine Planfläche ein:Einfügepunkt: Mittelpunkt der FrontplatteFlächenform: Rechteck in RechteckAuf der Rückseite platzieren: NeinBreite: 66,6 mmHöhe: 31,6 mmTiefe: 1 mmEckenradius: 1,8 mmBreite der Innenfläche: 59,6 mmHöhe der Innenfläche: 24,6 mmEckenradius der Innenfläche: 0,8 mm
Bestellen Sie beide Dateien (im Frontplatten Designer: Bestellen > Alle geöffneten Frontplatten bestellen). Den Kleber zum Einsetzen des Displays können Sie direkt zu Ihrer Bestellung hinzufügen (mit dem Bestellprogramm: "Artikel suchen" > Kategorie "Sonstiges" > "Artikel auflisten"; im Webshop: "Zubehör" > "Sonstiges").
